Did some stuff for a Fundamentals of Drawing assignment and I think it came out pretty neat! I chose to do the captain.

Did some stuff for a Fundamentals of Drawing assignment and I think it came out pretty neat! I chose to do the captain.
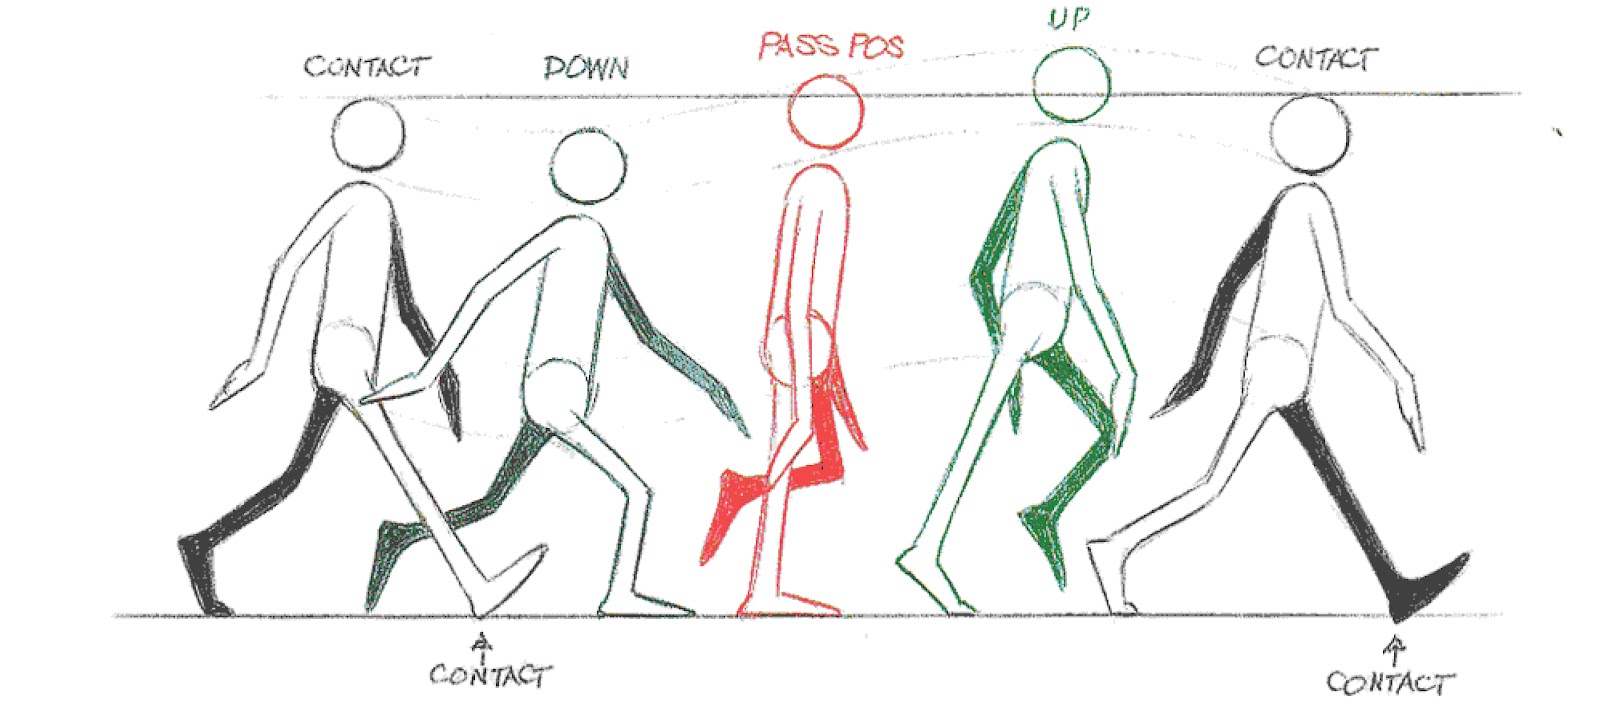
 I tried my hand at 2D animation for the first time in a few years! Clearly I need to practice more, because it came out quite jerky. Actually doing the animation was quite tedious too, because I used Sai which doesn’t have any sort of timeline or animation preview tools. I drew each ‘frame’ on a new layer, and lowered the opacity of the other layers manually to create and onion skin effect. I had to export each layer as a separate image file and plug the series of images into and online gif maker before I could even see what it actually looked like animated! Then I would notice a few flaws and have to do that all over again. I think if I learned anything, it would be that I need some software that can animate things properly, haha!
I referenced the key frames off this image and then tweened it.
Pre production usually involves exploring ideas for the brief and creating a storyboard and concept art to reference off further down the pipeline. In this instance the brief is to produce an advertisement for the board game “Pirate’s Gold”. Conveniently, the storyboard has already been supplied which leaves me with nothing to document my progress on for this stage.
Even so I will have to refer to this storyboard at various stages down the pipeline to meet the brief, so it’s is still very important.

Modelling is the creation of 3D assets for a production and is performed in 3D modeling software. I only have to model the chest which will be done in 3DS Max. To create the chest, we began with primitive rectangle and defined its parameters.

To make it more chest like, we incrementally added edge loops which allowed us to alter its shape with the scale and extrude tools, gradually adding more details. We then added a smoothing group to it, and the base was complete. Creating the lid was very similar, except we started with a much flatter rectangle.

I found modeling quite easy once I knew where the relevant tools were and what they did. I have tried modeling in the past with Blender and it usually ended poorly because I was basically just fumbling around in the dark, but following the video really helped with understanding things more.
Yeah okay this isn’t nearly as fun as modelling. UV mapping involves deconstructing a polygonal mesh to create a 2D image to apply a texture to, and it’s rather irksome. We selected groups of faces on the mesh that could be flattened out to a 2D plane with minimal distortion, which usually involved ‘breaking’ vertices in corners. Annoying little things kept happening like having to flip a shape because when you tried to relax it decided to do the opposite and freak out, or forgetting to select the shape before relaxing it and having some of your UVs go wonky like below.

Placing identical shapes on top of each other was also tedious. You would have to remember to check if they were both facing the right way (they probably weren’t) and then line them up vertice by vertice.
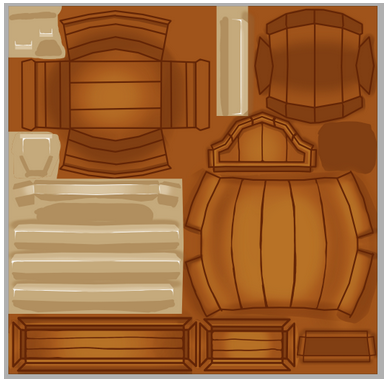
I got there though. My finished map isn’t the same as the videos because my UVs were a bit different, and I felt this arrangement was a better use of space for me. I just hope it doesn’t take this long every time I try to UV map something.

Texturing was a little more in my comfort zone. Texturing is a method of adding detail, surface texture and colour to an object by applying a 2D image maps to a UV map, which translates it onto the 3D model. I used Paint Tool Sai instead of Photoshop, and while there were a few differences and workarounds I needed to use, the end result came out really nice, in my opinion. I didn’t find not having macros or actions a problem at all, really. Tuning the UV layer invisible every time I wanted to save wasn’t too much of a hassle. The first issue I had was that as far as I know, Sai does not have an invert colours filter, but I found that applying the ‘screen’ layer effect gives neat white lines and hides the black.

I found that using straight lines drawing the outline on the chest was much easier than trying to get neat lines that followed the UV’s using my tablet. I didn’t really feel the need to use it until we started the details. All the shading was smooth sailing, except that sai does not have a linear dodge layer effect. Once again, the screen layer effect came to my rescue. It has seemingly the exact same effect. Here’s the texture, sans the details:
Creating the ambient colour and noise was a bit different too. There’s no colour dodge layer effect or noise filter. I had to use a slightly different colour to the one provided and use the screen effect again at 50% opacity to get a similar look to the example chest. For the noise I used one of Sai’s default paper textures with the grain set very small.
One thing that I learnt about Sai through this process is that if you put things in a folder and apply a layer effect to things in that folder, those layer effects won’t alter anything outside of that folder. This caused issues because the layers within the ‘Detail’ folders I made didn’t darken or lighten the base colour and shading like they were supposed to. I solved this by removing the folders and instead put ‘Detail:’ in the layer name. It does mean it’s a bit messier, but at least it works.
Below are my finished layers:

I couldn’t use smart objects either, and while I could see this being a problem in more complex meshes, for something as simple as bolts in a simple chest, copy and pasting served me fine.
Here’s the completed texture on the chest!

Rigging was super easy in this case, but I’m sure it gets much more complicated the more complex the model is! A chest is really only capable of movement via the opening and closing of it’s lid, and so to achieve that you move the pivot point of the lid to where the hinge should be. That way, when you rotate the lid, the hinge remains in place while the rest of the lid rotates around that point, allowing you to animate the chest opening just like how a real one would.

I linked the lid to the chest and the chest to the control object to make it easier to move and animate in the final scene.
I found animating to be quite tedious in certain aspects, but besides that it was pretty straight forward. It involves positioning the objects at notable stages of movement into key frames according to the storyboard. Before I could commence actually animating, I had to set the scene up first and that was easy enough, especially since all the assets were already provided.

I found that thing where if you altered an object in way it hadn’t been altered before with autokey, it automatically makes a key for the unmodified object at the start rather annoying but at least it was rather easy to fix. Another problem I ran into was trying to make the palms and crabs appear out of nowhere after the board opens, but I didn’t know how to make them invisible until a certain frame. I ended up just placing them above the skydome and making a stepped animation that jumps them to the position they should be when I wanted them to appear. It worked well.

Party in the Stratosphere
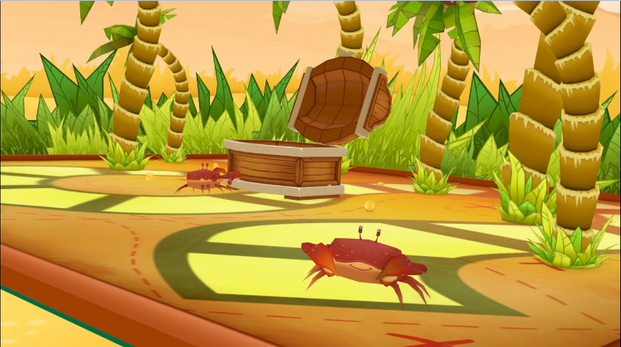
I’m really happy with how the animation on the chest came out! Using squash and stretch really gave it a lot of life, and with how the crabs moved around the board. I really wish the looping out of range type had a ‘start from this point’ option though, because I wanted my crabs to have an appearing animation separate from their scuttling animation. The only solution I found to this was to just copy and paste their scuttling animation keys from the point I wanted them to start moving, and it left my timeline looking like a key warzone. If I wanted to alter a key on the crab, I had to do it through the curve editor because I couldn’t tell what was what in my timeline.

What a mess
I wish I knew how to change the point where the coin effect occurred, too. I had to move my keys around to match where it happened because I stupidly didn’t add the effect to the scene until later.
Animating the camera was much easier than I was expecting, especially with the use of a parent dummy object. However, on my test render, it rendered the outside of the skydome, which left me with a screen full of sky. I didn’t know how to stop this happening, so it meant I had to pull the camera inside the skydome on most of the keyframes I set up, so the final shots are a tad closer than I would have liked, but I think it still looks fine. I still can’t believe I forgot to save my scene through the whole of doing the cameras, but at least you can get the gist of it through the final video.
Both of these were fairly simple in this project! Because of the bright and simple style, you could get away with simpler and faster methods of lighting and rendering. Lighting involves placing and determining the properties of the light sources in the 3D scenes. I used an omni light for this scene, as when I tried to use a skylight I think the the skydome blocked out the rays, leaving everything kinda dark. The omni light basically mimicked the lighting in the viewport, and I think it looked okay.

The gloomiest board game
Rendering is the process of converting a completed 3D scene that has gone through all the previous steps into a final series of digital images. I used the quicksilver renderer in this case, which basically just renders the scene as it was in the viewport. This meant I missed out on those nice soft shadows if I had of used Mental Ray, but I think the speed at which it rendered made up for that. I made sure to set it to 720p and had it render the range of frames I wanted it to and let it render. (Only after I had sorted my cameras out, though!)
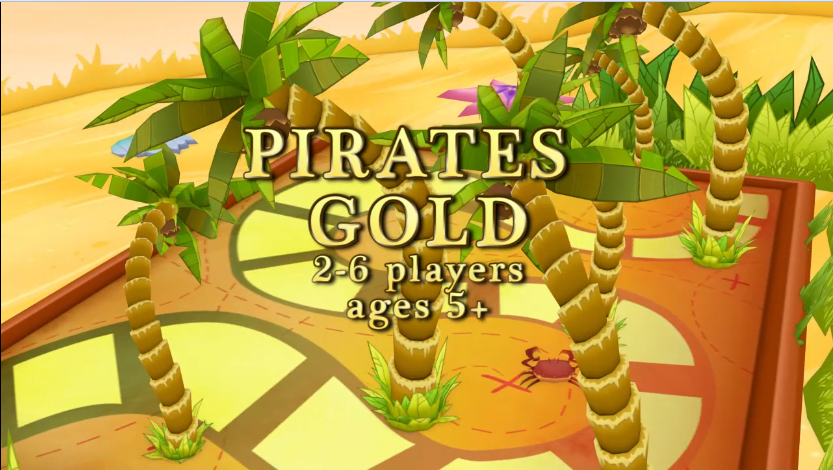
The home stretch! I imported the sequence of images from the render into Adobe Premier along with a snippet of soundtrack from one of my favourite games. (It’s the soundtrack for Dragon Roost Island in the Legend of Zelda: Wind Waker. dont sue me nintendo) I applied a fadeout to the soundtrack and composited a title to play at the beginning of the ad, which I applied a crossfade to the beginning and the end of. There was a preset in premier that looked just like gold, so I used that one and changed the font to resemble the logo on the board asset more closely. I then exported my video to an .mp4 and the project was complete!