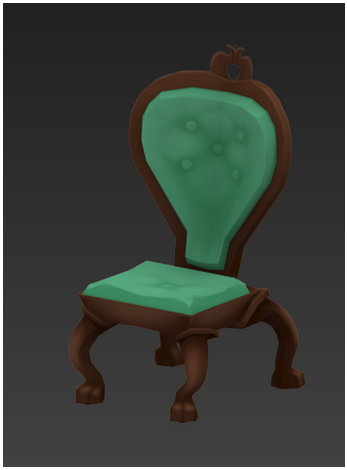
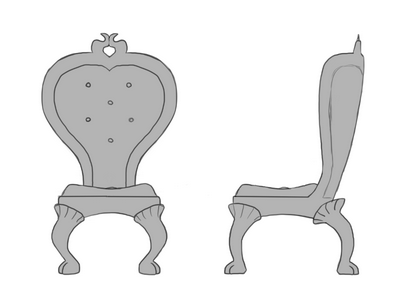
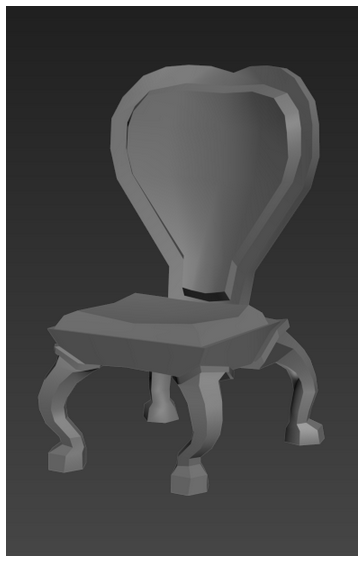
After too much consideration, I decided to model a chair! I really like the look of plush wooden fancy ones, so I collected a few references that appealed to me.


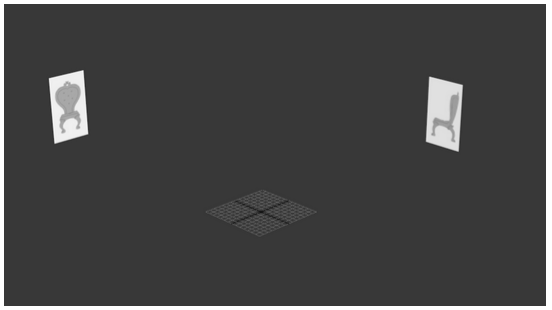
From there I synthesized the designs and created my own reference. To start, I shaped a silhouette first, and then added the lines where needed.

Next I set them up in 3DS Max’s viewport. I found that they made the modelling process a lot faster for me.
I began modeling the base and back of the chair by starting with a box primitive and turning it into an L shape that roughly matched my chair. I rounded the corners a bit and then inset and extrude the cushion parts of it. I then set up a symmetry modifier.

I moved a few more edges and vertices around and got something that was beginning to resemble what I had in mind! I wanted to add a few more edge loops here and there- especially to the back of the chair- but I left it for now.

For the legs of the chair I started with a cylinder primitive, and immediately applied a symmetry modifier. I extruded the top face of the cylinder until I got a shape that roughly resembled the shape of the legs.

I then went back and refined the model! I added the extra edge loops to the back of the chair and made the legs line up with the base better. At this stage I also tried subdividing the legs to make them smoother, but I didn’t really like how it looked so left them as is.
Then I extruded a plane from the top of the model for the curly detail. I thought about actually modelling it, but I decided that making an alpha channel to define its shape would be easier and more efficient.

At this stage I tried subdividing the legs to make them smoother, but I didn’t really like how it looked in contrast to the low poly base and back so left them as is.
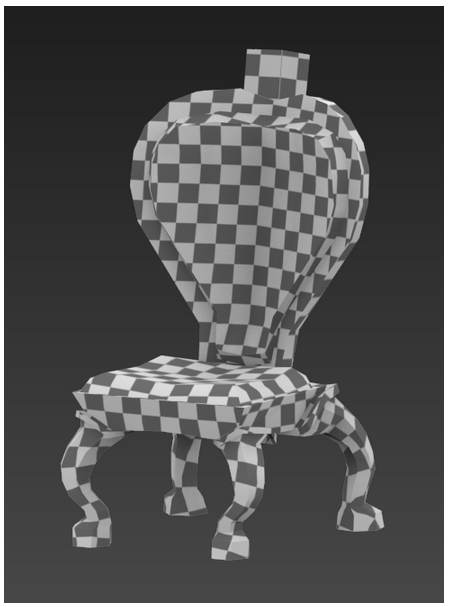
My final model has a total of 438 polys, which I think is pretty reasonable. I could have made it higher res, but if it’s for a game, it think the less polys the better.


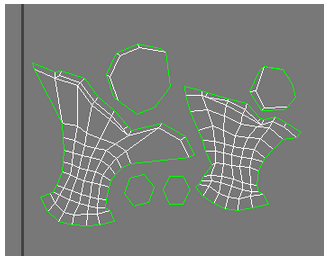
I was having some trouble with UV mapping again and in search of a solution I ran across this tutorial which outlines a slightly more automatic way of mapping polys using the flatten mapping option. It worked a treat for me and saved so much time!

I relaxed most of the polys a bit more and flipped and aligned symmetrical parts.


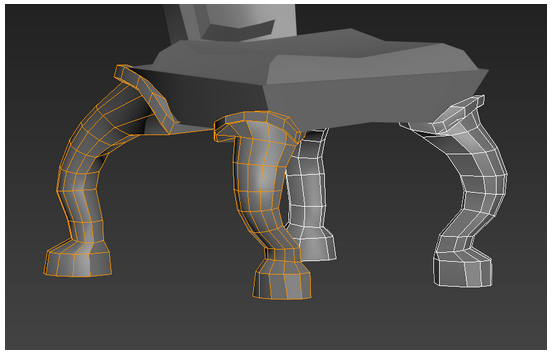
My luck didn’t last long. I tried using flatten mapping on the legs and it didn’t turn out that great.

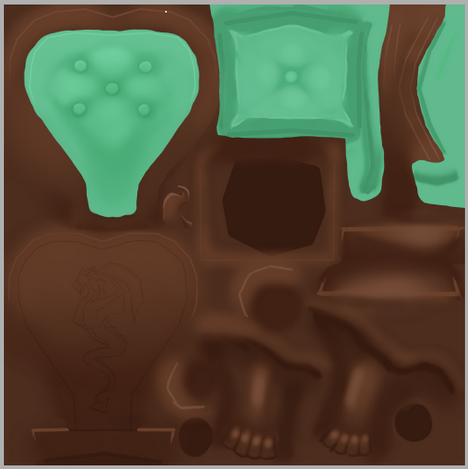
I did a bit more browsing through tutorials and found that seams are probably the best way to go for something as organic as this. I used this tutorial http://knowledge.autodesk.com/support/3ds-max/getting-started/caas/CloudHelp/cloudhelp/2015/ENU/3DSMax-Tutorial/files/GUID-26F0417C-573D-4ED4-954E-E79CE0A96D3D-htm.html and found that it’s as simple a selecting the edges, converting them to seams, and then hitting quickpeel in the UV editor. There was still some minor stretching, but I think it worked well nonetheless!


I relaxed the polys and lined them up, then collapsed the modifiers and applied UVW to both the chair and the legs to combine them.