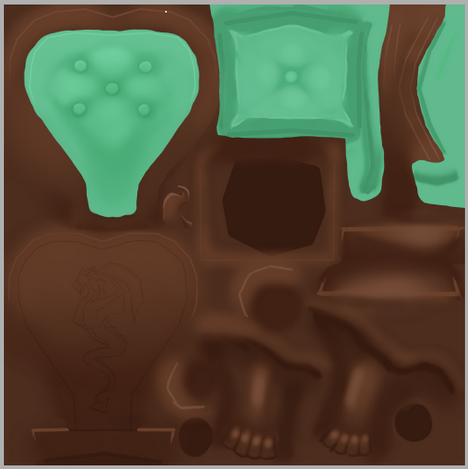
I did the texturing in paint tool sai again. To start I applied the screen layer mode to the UVs and applied a base coat.

I then made an alpha map simply by creating a new layer and painting black where I wanted it to be transparent. I exported it as a .png and plugged it into the material editor.


I added the shading and highlights.

On a layer above these I added the base colour for the cushion. To ensure I didn’t paint outside of where the base colour was whist shading it, I made each layer above it a clipping group. I proceded with the shading and highlights.

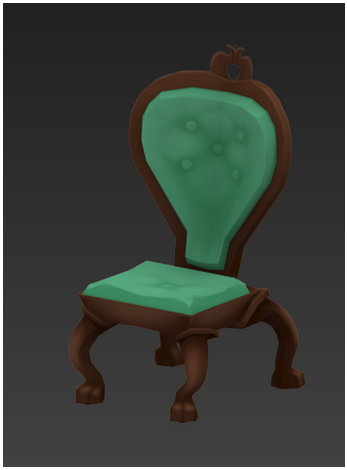
I drew a dragon on the back of the chair because it was looking a little plain.

I then added a new layer for the buttons in the cushions and copy and pasted them where I wanted them. Then the texture was complete!
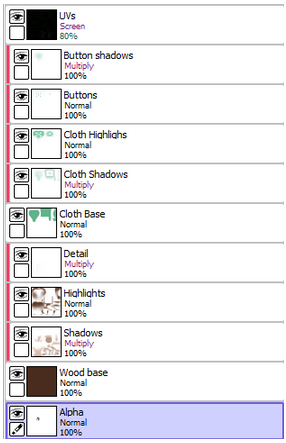
Here are my finished layers. The ones highlighted in pink have clipping group applied to them.
To begin animating the turnaround, I linked the legs to chair, then set up autokey, rotated the chair 180 at frame 60 and then again 180 at frame 120 back to it’s original position. I then and switched the animation from smooth to linear in the curve editor.

For rendering I tried applying a glossiness map to the wood of the chair, but I’m not sure it made much of a difference.

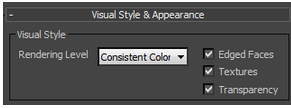
I set up a plane on the floor and made and opacity map to have it appear like the ground fades into the distance. I made it light grey and made the rendered background white. To make the polys visible in the final render I applied a standard material to the chair and made it a very light grey, and then in the renderer tab of render settings turned on the edged faces checkbox.
Next was video editing. I imported all of my image files as a sequence as well as my reference drawing and lined them all up to play in sequence. I added a few titles including the polycount and renderer, and stuck on some fancy royalty free music. Then I was all done!
