Endless Runner/Specialsation: Planning

I chose the modelling Specialization for this tri and was also part of the endless runner project, and since I had to do very similar things for both of them I decided to combine them into one to help save time! I learnt a whole bunch through this project, like how to sculpt, retopologize, bake normal maps using x normal, some basics in unity and how to animate a run cycle.

To start off with I help out Ben a little bit with the project conception and management side of things. He explained his concept to me and I explained from an animators perspective what that would involve from us and other things to be aware of. For example, we intended to just use one set of animations and a specific rig and apply them to everyone’s models, but I brought up that doing that would probably make it hard to include secondary animations for people’s characters if they had long flowing parts or something similar. We didn’t want to increase to workload for everyone even more by asking them to do animations also, so Ben made sure to make everyone aware this at the start of the project.

Along with this, based of Chris’s suggestion, I made a starter kit and instructions for the project to help ensure everyone’s models were to the correct specification and to make the programmers jobs easier. I tried to consider as much as possible and explore any issues that could arise down the production pipeline while also consulting with Ben to see if there was anything I could to do to make implementing the models in the game easier. For example, I set the pivot points to the bottom-center for the obstacle assets and to the start of the road sections so they could easily be adjusted to the correct positions in engine. staterkit.PNG

instructions.PNG

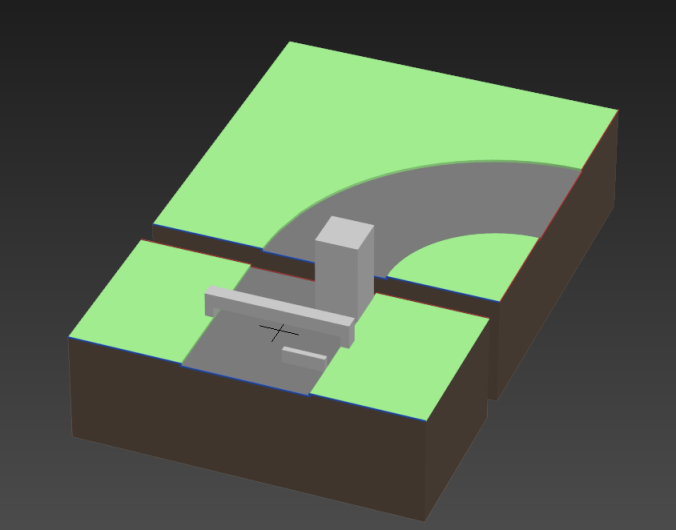
Along with this we had a folder in google drive set up, and because we were doing a parallel style production everyone had their own folders in which they could place their models into rather than having different folders for each different model ect. and we fond it worked very well foe the people who ended up completing their scenes. We also had a slack channel set up were we could announce meetings, show were we were up to and ask for feedback or questions and found it was essential for the communication in this project. (ANM220.LO14 Describe efficient workflows for handling asset data across various production stages, from concept to completion.) (ANM220.LO17 Implement & maintain technical frameworks that allow for collaborative production)

google drive.PNG

slack.PNG

To try and help keep everyone on track we had weekly meetings on Wednesdays where we asked to be up to a certain stage in the production pipeline and show off our work to the rest of the group to receive feedback. I think this agile based methodology would have been very effective if the endless runner wasn’t a side project and more of team could have been up to date, but it worked very well for me and kept me pretty well on track.

(ANM220.LO15 Produce work on time and within scope by engaging appropriate project management methodologies)


Rapid Reboot Project Post Mortem

Tidal wave of blog posts incoming! Really should have done this earlier, whoopsies. Lets see how much I can remember.

The rapid project for this trimester was to create a short teaser trailer for a classic video game. As usual we had a time budget of 10 hours a week as well as randomly generated specifications. Our group generated the games Jazz Jackrabbit and Monkey Island and the teaser styles Environment fly through and music video. In hindsight we really should have asked for another roll on the game choices as none of us were familiar with either of those games, but we ended up deciding on Monkey Island in an environmental fly through style.

hqdefault

It was decided pretty early that we would do the project in 2D seeing as most of the team said they were more competent with drawing than modeling. Our initial plan was to make flat illustrations and zoom out through the various scenes, starting in a building and then resolving with a wide shot of the Island. I made some rough color keys/environment concepts after doing some research into the locations in the game.

jail.png

The Jail on Melee Island

church.png

Outside the jail with the church to the right

island (1).png

Shot of the whole of Melee island

We pitched this idea and provided a storyboard and received some criticism that our teaser wouldn’t be capturing the essence of the original Monkey Island game, which I agreed with and really should have pushed my team more to take it into consideration. I think as a team we really needed to become more familiar with game as a whole instead of just jumping to conclusions about what it was about, which definitely isn’t the right way to appeal to fans of the series and create an effective trailer. (ANM220.LO19: Work objectively towards a common goal by giving constructive criticism and applying feedback, ANM220.LO12 Evaluate the effectiveness of production processes undertaken)

I was asked to create a vertical slice quite early in the project to show what the final project would look like.

verticle-slice.png

I made sure apply some visual fundamentals with this piece as it was supposed to represent the final quality of the project! Colour theory, lighting and values were things I relied on to keep the illustration interesting as the jail was quite dull, composed entirely of browns and blacks, so I made sure to have enough contrast between all those things, like the blue shadows and the orange of the firelight. There’s no fire in the scene because it was going to be added in after effects. (ANM220.LO10 Combine elements with consideration of visual fundamentals to produce aesthetically cohesive work)

I made sure to keep the image size large because the camera would be zooming through the image and if I didn’t you would likely see pixels in the final product. I was also asked to keep different elements on separate layers in case they needed to be animated in after effects to create a better sense of the camera moving through the illustration. (ANM220.LO.11 Output work that conforms to technical specifications required for the chosen medium)

We had a change in the production method about halfway through our project, which required a few of the assets we had already done to be heavily modified and ended up increasing the workload for a few team members. We were asked to separate the background we had already done into separate images and remove any lighting we had painted in so the environment could be built in 3D in after effects using cards and have the lighting applied in there. I really should have shared my thoughts on it more as I felt it was a bit of a risk so late in the project and took some of control I had over what my art looked like in the final product away.

So I split up and reduced the lighting I had done in the jail scene. All our assets were kept convieniently on Google Drive And we communicated on Slack, though we would have benefited a lot more from more exhaustive documentation and a more fleshed out assets list, which I really should have helped out with. (ANM220.LO17 Implement & maintain technical frameworks that allow for collaborative production)

jail split.PNG

Here are the rest of the assets I made for the project!islandlayers

Town backdrop

buildingfront.png

buildingside

And the final product in which we asked some audio students to create a backing track to fit the video. It turned out they had a few issues we had no idea about, so we probably should have prompted them to communicate more or added the to our slack. (ANM220.LO02 Effectively integrate sound with animation.)

I’m not entirely happy with the final product but we did get in on time and to the brief’s specification, that being a teaser of our designated game and style that was between 15-30 seconds.

(ANM220.LO15 Produce work on time and within scope by engaging appropriate project management methodologies) 

(ANM220.LO16 Operate in a production environment to conceive, create, and implement creative productions) 

(ANM220.LO18 Interpret a brief and deliver a product to a client’s specification)